Many gardeners are interested in vermicomposting but need to know where to begin. Rhonda Sherman is a leading vermicomposting expert and author of ” The Worm Farmer’s Handbook.”
Rhonda is a North Carolina State University Extension Specialist and director of the Compost Learning Lab. Rhonda organizes the annual NC State Vermiculture Conference. She travels across the country to give workshops on vermicomposting, consult with farmers, businesses, and other institutions, and organizes them.
Last week’s episode is available for you to listen to before you dive into this episode. Rhonda shared the many benefits of vermicompost and why it was such a valuable soil amendment last week. Rhonda will be sharing the essential facts and steps for getting started with vermicomposting.
These are the Four Biggest Mistakes of Home Vermicomposters
Worms will not adhere to a food schedule if they are overfed It is important to monitor how much food they eat and reduce it if they have slowed down. You should only give them more food if they have eaten what you provided at the previous feeding. If you continue to add food, the worms are more likely to seek out fresher foods before they consume the older ones.
Rhonda suggests that they have a composting bin for their backyard and a bin for worms so that they can put vegetable scraps and fruit.
A worm bin should not be watered if there is too much moisture Anaerobic conditions can result, which can really stink the bin. It is better to moisten the bedding before it goes in the container.
You need to recognize that you are practicing earthworm husbandry – Taking care of these animals is so important. They must be provided with the right environment.
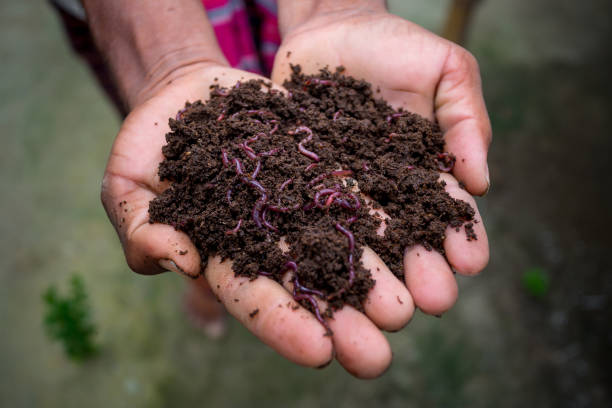
To understand the correct species of earthworm, you must first be able to identify them. Vermicomposting earthworms are epigeic. This means that they live in organic composting materials, not soil.
Make a vermicomposting bin
Rhonda suggests that new vermicomposters create their own vermicomposting system. There are many products and systems available. She says spending hundreds on a vermicomposting system or product is unnecessary when you can make one yourself from an opaque plastic bag.
It costs less than $10 to start with a 14-gallon plastic bag. Rhonda knows of home vermicomposters who keep their wormbins in the basement. However, Rhonda also knows people who keep them in their master bedrooms or have a beautiful coffee table that doubles up as a wormbin.
Use the smallest drill bit that you have to make holes in the bin’s top inch. Keeping light out and moisture in is vital, so make sure you don’t put holes in your lid. The worms require 80% moisture in the bin, particularly the top four inches. Rhonda states that some worm bin makers don’t understand the needs of worms. They put holes in the lid to allow air in, but it is important to keep the moisture in. The holes at the bottom of the bin will provide oxygen.
To allow liquid to drain out, you will need six quarter inch holes in the bottom. Rhonda suggests that the bin be placed on a tray or extra lid to collect all liquid. However, Rhonda points out that excess liquid will not form if moisture is properly managed.
Leachate Vs. Worm Tea
Rhonda refers to excess liquid from wormbins as “stinky and mystery liquid”. It’s also called leachate. This is because it’s anaerobic which means it has microbes that have proliferated in the absence or air. It is not the same as worm tea which is good for plants. The smelly leachate may contain pathogens and acids that can be harmful to your plants.
I first started vermicomposting when I was just starting out. I kept some leachate, and mixed it with 10:1 water. This mixture was then poured into pots for some struggling azalea plants. The next day I noticed a significant improvement.
Rhonda states that there are vermicomposters out there who have had success with leachate in their plants. They purposely add more water to their worm bins so they can get more. This is dangerous for the worms as well as the environment they need to thrive. She said that if the worm bin contained spinach contaminated by E.coli, then leachate that is applied to your garden would contain E.coli.
Actual worm tea is an extract from worm castings that’s brewed in a brewing process.
The right temperature for Worm Bins
Rhonda suggests that earthworm species for worm bins should be kept at 60 to 80 degrees. This temperature range will allow them to consume the most food, make the most babies, and cast the most castings. They are able to tolerate higher temperatures, but their activity will slow down.
Humidity is also a factor. California has low humidity so the worms might prefer 95 degrees. Rhonda lives in North Carolina where there is high humidity and 95 degrees is too warm for her worms. Be aware of the local conditions.
Rhonda’s worms are kept in an unheated, uncooled worm barn located on university property. Rhonda’s worms have survived heat up to 100 degrees. They also survived three days of 10 degree weather. In fact, ice acts as an insulator so commercial vermicomposters who anticipate freezing temperatures will mist their bins to create that layer of ice.
Rhonda states that worms can live outdoors in wintertime with proper insulation in regions as cold as New England. Even if adults die, worm cocoons can survive the winter and hatch when the conditions are right.
Worm Bins with Citrus
Citric acid is found in citrus fruits, such as grapefruits, lines, oranges and clementines. This can cause problems for worm bins if there is too much.
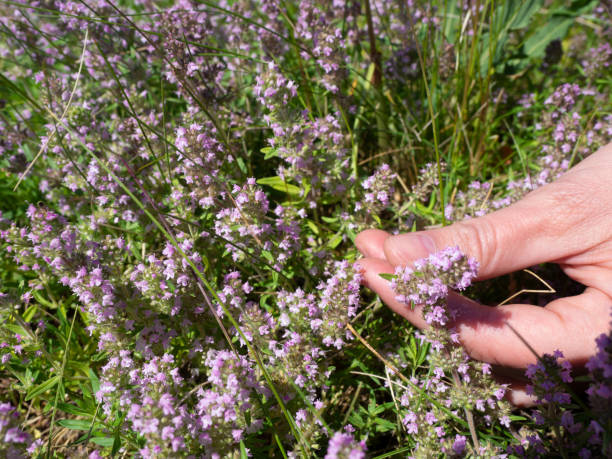
You don’t want to add citrus to a small worm-bin. Instead, just toss it into your regular compost. If you have a very large worm bin, like Rhonda’s four-foot-by-eight-foot bin, some citrus won’t be an issue. She says that if the bin is smaller than 14 gallons, the citrus can overwhelm the system. It adds too many acidity and throws off the pH balance. This could really mess up your system.
You can do both, not one or the other
The many benefits of compost include improving soil’s porosity and tilth, adding nutrients, and increasing microbial activity. Vermicast is a supplement to regular compost that supercharges it. Vermicast can be compared to salt being added to your favorite meal. Vermicast is the enhancer that makes your favorite dish even better. However, a small amount can make a big difference.
How to Choose and Wet Bedding Material
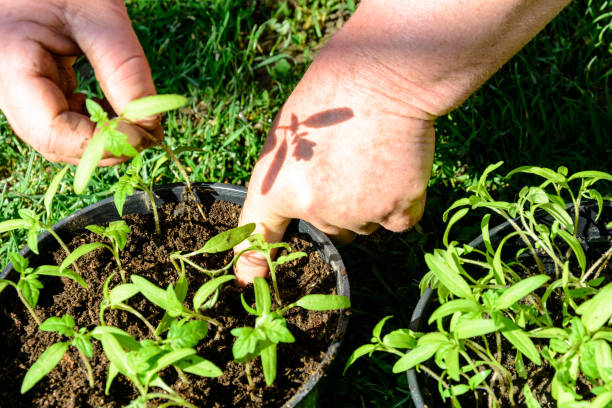
Stable organic material is important in order to maintain the property moisture level of a worm-bin. This is the bedding the worms sleep on. Popular bedding options include cardboard, newspaper, and office paper. Although leaves can be useful, they are susceptible to carrying fly eggs, so it is best to keep your worm bin indoors.
Remember that soil is not the best bedding material for worm bins. Worm species that are suitable for worm bins do not live in soil in nature. Instead, they live in decaying organic materials.
It is easy to start by filling the 14-gallon container half with wet shredded papers. Rhonda suggests that you soak the paper in water for 10 minutes before adding it into the bin. This will ensure that the paper is wet throughout the process. Then, separate the paper and place it in the bin.
Your worm bin should not be filled with water. Only add wet bedding material to your worm bin.
Other options for bedding include coir and peatmoss.
Peat is naturally acidic so lime must always be used to adjust its pH. Peat is a popular bedding choice for commercial worm growers, which are businesses that raise worms for profit rather than making vermicast. Many gardeners are losing interest in peat moss because it isn’t sustainable and creates carbon emissions.
Coir, a byproduct from coconut farming, is imported to the United States. It also has a carbon footprint. It makes more sense not to use materials you don’t already have, like used paper.
Fertilizers who have worked on larger scales can use finished compost or aged composted manure. Because uncomposted manure or immature compost will heat up, it must be aged.